 info@nbcoir.com
 +94
+94 
Ultimate Guide to Coco Coir Discs for Propagation and Seed Starting
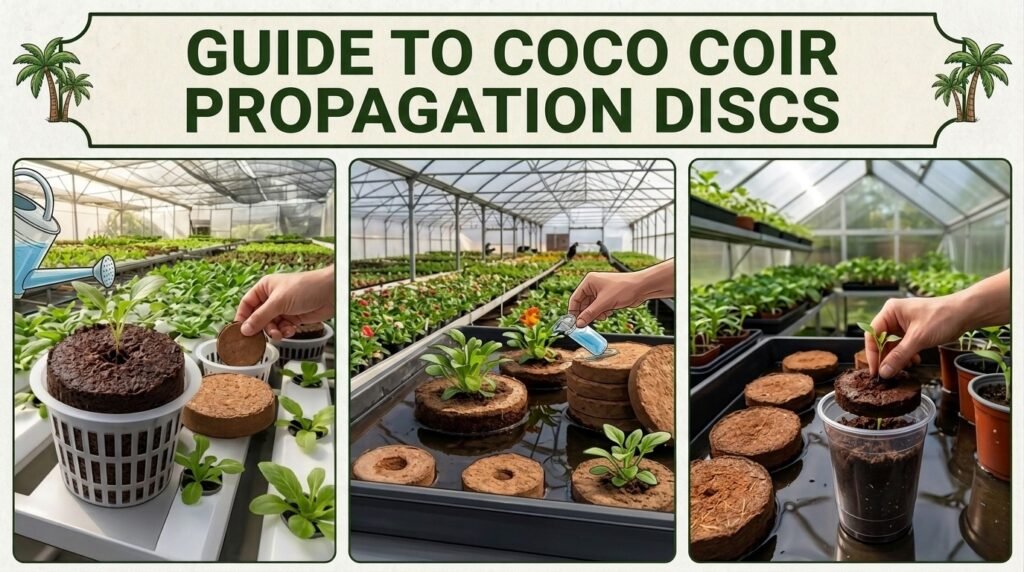
Coco coir discs for propagation are one of the cleanest and most effective tools available for starting seeds and rooting cuttings. These compressed discs expand quickly with water and create the perfect sterile environment for strong seedling growth.
This complete guide explains exactly how coco coir discs work, why they are ideal for seedlings, step-by-step usage instructions, and proven success tips that help gardeners and nurseries achieve higher germination rates with less mess and fewer losses.
What Are Coco Coir Discs for Propagation?
Coco coir discs are flat, round, compressed tablets made from fine coconut coir pith (the spongy material from coconut husks). They are usually 20–50 mm in diameter when dry and often come wrapped in a thin biodegradable netting that holds their shape after expansion.
When you add water, the discs absorb moisture and expand vertically 5–10 times their original height within minutes, turning into soft, cylindrical plugs ready for sowing.
Key advantages over traditional peat pellets or loose soil:
- 100% peat-free and renewable
- Naturally resistant to damping-off fungus
- Excellent balance of water retention and aeration
- Minimal mess and easy to store
- Roots can grow freely and transplant with almost zero shock
How Coco Coir Discs for Propagation Work
The science is simple but highly effective:
- The dry disc is densely compressed coir pith.
- Warm water is absorbed rapidly through the natural fibres.
- The coir expands into a light, fluffy structure with high air-filled porosity (typically 25–33%).
- It holds up to 8–10 times its weight in water while still allowing excess water to drain.
- The result is a stable micro-environment that keeps seeds consistently moist without becoming waterlogged — the ideal condition for germination and early root development.
Because the medium is virtually sterile and has a near-neutral pH (usually 5.5–6.5), seedlings face far fewer disease pressures than in ordinary soil or compost.
Why Coco Coir Discs Are Ideal for Seedlings & Propagation
| Benefit | Why It Matters for Seedlings |
|---|---|
| Sterile & low pathogen risk | Dramatically reduces damping-off |
| Perfect moisture balance | Seeds stay moist but never soggy |
| High aeration | Strong, healthy root systems develop faster |
| Easy transplant | Plant the whole disc — almost no root disturbance |
| Consistent quality | Every disc expands the same way |
| Sustainable | Renewable alternative to peat moss |
| Clean & space-saving | Ideal for indoor trays, greenhouses, and small spaces |
They work especially well for vegetables (tomato, pepper, lettuce, cucumber), herbs, flowers, and many ornamental cuttings.
Step-by-Step: How to Use Coco Coir Discs for Seed Starting
1. Prepare the Discs
- Place the dry discs in a waterproof tray with the small indentation facing upward.
- Pour warm (not hot) water over them — roughly 30–100 ml per disc depending on size.
- Wait 5–15 minutes until fully expanded. Gently fluff or break up any remaining hard spots if needed.
2. Sow the Seeds
- Make a small depression in the centre of each expanded disc.
- Place 1–2 seeds per disc (depth = 2–3 times the seed diameter).
- Lightly cover with a thin layer of coir or vermiculite if required.
- Label your trays clearly.
3. Create the Right Environment
- Cover the tray with a clear humidity dome or plastic wrap.
- Keep in a warm place (20–25°C / 68–77°F is ideal for most seeds).
- Provide bright light or grow lights as soon as seedlings emerge.
- Remove the cover once most seeds have germinated to prevent excess humidity.
4. Watering & Care
- Keep the discs evenly moist but never waterlogged. Bottom-watering is best.
- Once true leaves appear, start a very dilute liquid fertiliser or Cal-Mag solution (coco has almost no nutrients of its own).
5. Transplanting
- When seedlings are strong enough (usually after the second set of true leaves), plant the entire disc into larger pots, grow bags, or the garden.
- If the disc has netting, you can leave it on (it is biodegradable) or snip it carefully to allow freer root expansion.
Proven Success Tips for Higher Germination Rates
- Always use warm water for faster, more even expansion.
- Do not overcrowd — one or two seeds per disc is enough.
- Maintain consistent moisture; never let the discs dry out completely.
- Provide good air circulation after germination to prevent fungal issues.
- Start feeding lightly once true leaves appear.
- Harden off seedlings gradually before moving them outdoors.
- Choose low-EC, washed, and preferably buffered discs for best results with sensitive crops.
- Store unused dry discs in a cool, dry place — they last for years.
Common Mistakes to Avoid
- Using cold water (slows expansion)
- Overwatering after expansion (leads to rot)
- Planting seeds too deep
- Leaving the humidity dome on too long after germination
- Forgetting that coco coir needs nutrients from the start of active growth
Final Recommendation
Coco coir discs are one of the simplest and most reliable ways to start seeds and propagate plants. They combine the cleanliness of a soilless system with the root-friendly structure of natural coir, making them perfect for home gardeners, nurseries, and commercial growers alike.
Whether you are starting a few trays of tomatoes on a windowsill or producing thousands of plugs in a greenhouse, high-quality coco coir discs deliver consistent results with less mess, fewer losses, and stronger seedlings.
Start with good-quality, low-EC discs, follow the simple hydration and sowing steps above, and you will see healthier, faster-growing plants from the very first stage.
Frequently Asked Questions
What are coco coir discs and how do they work for seed starting?
Coco coir discs (also called coir pellets or coco peat discs) are small, compressed round tablets made from natural coconut husk fibre. When you add water, these dry discs quickly absorb moisture and expand 5–10 times their original size, turning into soft, airy plugs.
This expanded structure provides the perfect balance of moisture retention and aeration, making coco coir discs ideal for seed starting and propagation. Seeds germinate in a clean, sterile environment with reduced risk of damping-off disease.
Why are coco coir discs better than traditional soil or peat pellets for seedlings?
Coco coir discs offer several clear advantages for seed starting:
- They are 100% peat-free and sustainable
- Naturally resistant to fungal diseases like damping-off
- Excellent water-holding capacity without becoming waterlogged
- High air porosity that encourages strong root growth
- Minimal mess compared to loose soil
- Easy transplanting — you can plant the entire disc with almost zero root disturbance
These benefits make coco coir discs one of the most reliable choices for both home gardeners and commercial nurseries.
How do I expand and prepare coco coir discs correctly?
Follow these simple steps for best results with coco coir discs:
- Place the dry discs in a waterproof tray with the small indentation facing up.
- Pour warm water over them (about 30–100 ml per disc depending on size).
- Wait 5–15 minutes until the coco coir discs fully expand into soft cylindrical plugs.
- Gently fluff any remaining hard spots if needed.
- Your coco coir discs are now ready for sowing seeds.
Using warm water helps the discs expand faster and more evenly.
How many seeds should I plant in each coco coir disc?
Plant 1 or 2 seeds per coco coir disc.
Planting two seeds gives you a better chance of successful germination. Once both seedlings emerge, you can thin them by removing the weaker one, leaving the stronger seedling to grow. Avoid overcrowding, as it reduces air flow and increases disease risk.
Do coco coir discs contain nutrients for seedlings?
No. Coco coir discs are a pure growing medium and contain almost no nutrients.
Once your seedlings develop their first true leaves, start feeding them with a very dilute liquid fertiliser or a Cal-Mag solution. This is especially important because coco coir has a high cation exchange capacity and can hold onto nutrients if not managed properly.